server 受 ssh暴力登入攻擊的分析與防禦(4)--使用 captcha 及 2FA
根據 Securing SSH access with pam captcha - beta.michaelboman.org 這篇文章的說法,雖然網路上很多人都說可以改 SSHd 的 port 或設定防火牆來避免攻擊,但是這些做法看起來都不夠"乾淨"。
確實,我在前幾篇文章安裝 fail2ban 後,還是不斷看到有登入的嘗試,幾個禮拜下來,穩定被封鎖的 ip 數量只有80幾個,就整體的潛在攻擊 ip 數量(可能上千個),這只是冰山一角而已。攻擊者可以同時控制上千台電腦進行攻擊,每一台都屬於不同ip,每一個 ip 在一定時間內都只攻擊一次,這樣就有可能避開 fail2ban 的規則,在時間脫離觀察名單後再發動攻擊。

文章 How To Prevent Brute Force Attacks With 8 Easy Tactics | PhoenixNAP KB 提到,可以使用 Captcha 或 2-Factor Authentication (2FA) 來避免這類攻擊。
安裝 ssh captcha
首先,從 ssh captcha | javier.io 這篇文章我們知道,使用 2FA 例如 google authenticator 有點麻煩,因為必須要打開手機 app 取得驗證碼,儘管驗證碼是 time-based 不需要連線,但手機不一定會隨身攜帶,這就造成了問題。因此該文作者比較喜歡用 captcha 方式進行驗證。
根據 https://github.com/minos-org/libpam-captcha
1. 加入PPA
sudo add-apt-repository ppa:minos-archive/main2. 安裝
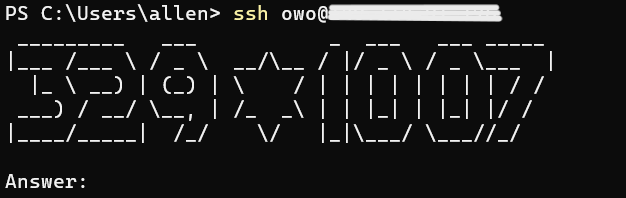
sudo apt-get update && sudo apt-get install libpam-captcha上述安裝完之後,需要密碼登入ssh時就會自動啟動 captcha ,如下所示:
(base) user@server:~$ ssh user@1xx.1xx.xx.xx
          _    _ _      _____        _    _
         | |  | | |    / ____|      | |  | |
 _ __ ___| |  | | |__ | (___ _______| |  | |
| '__/ __| |  | | '_ \ \___ \_  / _ \ |  | |
| |  \__ \ |__| | | | |____) / /  __/ |__| |
|_|  |___/\____/|_| |_|_____/___\___|\____/


Answer:
只要在Answer 中輸入看到的英文字即可。
又該文提到,可以在 fail2ban 中加入 captcha 輸入錯誤的規則。開啟 /etc/fail2ban/filter.d/sshd.conf
sudo vi /etc/fail2ban/filter.d/sshd.conf找到 [Definition] 段落,在 cmnfailre = 後面加上一行規則:
^%(__prefix_line)s(?:error: PAM: )?Permission denied for .* from <HOST>$重新啟動 fail2ban 服務使修改結果生效:
sudo systemctl restart fail2ban這樣,當 captcha 輸入錯誤時,就會在 fail2ban 留下一次紀錄。
設定
根據 Captcha for your ssh login | vpsBoard
開啟 /etc/pam.d/sshd
sudo vi /etc/pam.d/sshd在第一行加入
auth requisite pam_captcha.so math randomstring然後編輯 /etc/ssh/sshd_config
sudo vi /etc/ssh/sshd_config修改成以下設定:
PermitRootLogin no
PasswordAuthentication no
ChallengeResponseAuthentication yes
UsePAM yes
作者說最好要把 PasswordAuthentication 關閉,因為若開啟的話,攻擊者可能繞過captcha 直接使用 password 驗證。
修改完後記得重啟ssh
sudo service ssh restart安裝 2FA (google authenticator)
雖然 captcha 已經可以抵擋大部分攻擊,但還是有弱點的。假如哪天攻擊者使用進階的 AI OCR 技術直接對 ascii-captcha 進行分析,是有可能成功通過驗證的。因此更安全的方法是使用 2FA ,在每個帳戶開通前都要設定 2FA ,之後每次登入都要輸入一次 2FA 驗證碼。由於 2FA 需要個人手機,除非攻擊者取得你的手機,否則無法通過驗證。
參考 How to Secure SSH with Google Two-Factor Authentication - The Devolutions Blog
更新
sudo apt-get update安裝
sudo apt-get install libpam-google-authenticator設定
打開 /etc/pam.d/sshd
sudo vi /etc/pam.d/sshd把下面這一行加到檔案開頭(在 captcha 設定 auth requisite pam_captcha.so math randomstring 之前):
# google authentication
auth sufficient pam_google_authenticator.so nullok
note: 根據 https://serverfault.com/a/758119/451844 的說法, 加上 nullok 可以允許還沒有設定 Google Authenticator 用戶直接跳過驗證,以免用戶還沒有設定就被鎖上。開啟 /etc/ssh/sshd_config
sudo vi /etc/ssh/sshd_config修改成以下設定(如果captcha 已經設定過就可跳過)
ChallengeResponseAuthentication yes重新啟動sshd service
sudo service ssh restart混合 captcha, 2FA, 與 publickey
我希望能夠建立以下登入流程
1. 當使用者沒有建立 2FA 時:需要輸入 captcha 與 password。
2. 當使用者有建立 2FA 時:需要輸入 Verification code。若驗證成功,則直接登入;若驗證失敗,則回到1
3. 當使用者使用 publickey 驗證時:不管有沒有 2FA 都直接登入。
首先,第1, 2條規則可以在 /etc/pam.d/sshd 設定
sudo vi /etc/pam.d/sshd將以下兩行加到檔案最頂端
# google authentication
auth sufficient pam_google_authenticator.so nullok
#Autogenerated by libpam-captcha
auth requisite pam_captcha.so math randomstring
說明:參考 https://serverfault.com/a/740881/451844 的做法, 將auth sufficient pam_google_authenticator.so nullok放到檔案最頂端,其中sufficient表示只要通過該驗證,就不會再執行之後的驗證模組了。更詳細的選項設定可以參考 pam.d(5): PAM config files - Linux man page 及 [1]
說明2: 在某些情況下,pam_captcha.so 可能會找不到路徑。因此需要明確寫出完整路徑,例如: `/lib/security/pam_captcha.so`
第3條規則,可以在 /etc/ssh/sshd_config 設定
sudo vi /etc/ssh/sshd_config將以下內容加到檔案最底端
AuthenticationMethods publickey keyboard-interactive說明:根據 sshd_config(5) 說明, AuthenticationMethods 後面可以接上多種驗證方式,例如: "publickey,password publickey,keyboard-interactive" ,其中空格( )是OR,當第一組失敗時,嘗試用第二組;而逗號(,)是 AND,表示必須要完成這兩種驗證才算完成。因此上面的例子表示不論如何都需要 publickey ,而後可以用password 或 keyboard-interactive。這裡的 password 指的是 sshd 內建的方法,因此當設定為PasswordAuthentication no時,password 就被關閉了。如果使用sshd -t檢查語法時,會出現
Disabled method "password" in AuthenticationMethods list "publickey,password"
sshd: no hostkeys available -- exiting.
此外,你也可以針對不同的使用者使用不同的驗證方法,例如 Three Alternatives for Enabling Two Factor Authentication For SSH On Ubuntu 16.04 And Debian Jessie 所提到的:
Match User jsmith
    AuthenticationMethods "publickey,password"
例如,我只想開放幾個受信任的使用者可以使用publickey或 keyboard-interactive 登入,其他使用者通通都關閉 keyboard-interactive 登入,只開放publickey:
Match User alice,bob
        AuthenticationMethods publickey keyboard-interactive
Match all
        AuthenticationMethods publickey
其中 Match User alice,bob 是開放使用者 alice 和 bob 可以使用 publickey 或 keyboard-interactive 登入,keyboard-interactive 就是混和上述 captcha 及 2FA的方式,並關閉內建的password 登入。而 Match all 則是其他所有使用者,都只能使用 publickey 登入。這樣,沒有 publickey 的攻擊者,自然無法登入,也無法透過其他登入方式嘗試破解密碼。除非攻擊者猜中有開放 keyboard-interactive 的使用者名稱,但是在猜中之前可能就被fail2ban 給 ban了。
參考: linux - OpenSSH: Different Authentication Methods - Server Fault
亦可匹配Group ,將使用者加入group中,match group:
Match Group users_with_no_ssh參考: ssh - Match multiple users in 'sshd_config' - Unix & Linux Stack Exchange
輸入 sshd -t 測試修改後的 /etc/ssh/sshd_config 是否正確?如果錯誤會跑出錯誤訊息,如:
/etc/ssh/sshd_config: line 129: Bad configuration option: Mat
/etc/ssh/sshd_config line 129: Directive 'Mat' is not allowed within a Match block
修正錯誤後,重新啟動sshd service
sudo service ssh restart再用 ssh 連線試試:
ssh bob@example.com如果你是bob,電腦中已經有publickey,便可直接登入;如果臨時使用別電腦,沒有publickey,仍可透過 captcha, 2FA 等方式登入。
或參考後面常見問題中的 4. 開放特定應用使用密碼登入
新增使用者
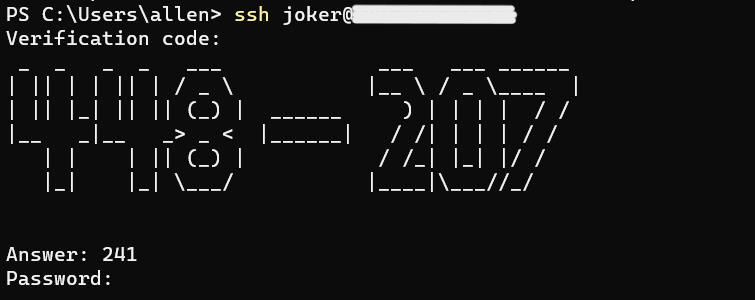
管理員完成以上安裝設定後,當要建立新的使用者時,可以使用 adduser 指令新增一個使用者帳號,並產生一組隨機密碼作為預設密碼,將該預設密碼透過安全方法傳給新使用者。新使用者接到預設密碼後,便可嘗試ssh登入。一開始登入會遇到 captcha 驗證,如圖所示:
輸入答案及預設密碼後,就可以登入該帳號。
之後,使用者可以設定 google-authenticator (設定方法如下一節所示) ,就能透過手機驗證碼進行登入,而無須記住密碼(記得修改預設密碼)。但若剛好手機不在手邊,驗證碼留空白或隨便輸入按enter,就會切換到 captcha 模式。
設定 google-authenticator
tl;dr 如果想要快速設定,直接輸入下方指令;詳細步驟請看下方解釋
google-authenticator -t -d -f -r 3 -R 30 -w 3How To Set Up Multi-Factor Authentication for SSH on Ubuntu 18.04 | DigitalOcean
- -t => Time based counter
- -d => Disallow token reuse
- -f => Force writing the settings to file without prompting the user
- -r => How many attempts to enter the correct code
- -R => How long in seconds a user can attempt to enter the correct code
- -w => How many codes can are valid at a time (this references the 1:30 min - 4 min window of valid codes)
This fully configures the authenticator, saves it to a file, and then outputs the secret key, QR code, and recovery codes. (If you add the flag -q, then there won’t be any output.) If you use this command in an automated fashion, make sure your script captures the secret key and/or recovery codes and makes them available to the user.
輸入
google-authenticator看到
Do you want authentication tokens to be time-based (y/n)回答 Y 以使用time-based 驗證碼

之後就會出現以下畫面:

使用 google authenticator 手機 app 掃描QR code,以便在手機上產生驗證碼;或可使用 authy app 取代 google authenticator app,可以支援多裝置同步,推薦使用 authy 。
接下來問你要不要寫入 ~/.google_authenticator 檔案,如果回答 no,這次產生的key 都不會被記錄下來,等於沒有做任何設定;如果回答 yes,設定就會被記錄下來,並且下次登入時就使用這組key 產生code。
Do you want me to update your "~/.google_authenticator" file (y/n)接下來問是否要禁止重複使用 passcode? 選no的話,同一個驗證階段可以輸入好幾次 passcode ,選yes的話,一個驗證階段只要輸入錯誤一次,就要等30s 才能重新輸入。為了避免回放及中間人攻擊,這裡選擇yes。
Do you want to disallow multiple uses of the same authentication
token? This restricts you to one login about every 30s, but it
increases your chances to notice or even prevent
man-in-the-middle attacks (y/n)
接下來問是否延長 passcode 的使用時間。預設情況下,為了避免 client 端與 server 端產生時間偏移,會接受現在時間前後30秒的 passcode,也就是 1:30 min 的區間中的3個 passcode;若回答 yes 的話,就增加到 4 min 區間中的 8個 passcode 為合法passcode。為了更強的安全性,請選 no 設為預設值。
By default, tokens are good for 30 seconds and in order to
compensate for possible time-skew between the client and the server,
we allow an extra token before and after the current time. If you
experience problems with poor time synchronization, you can increase
the window from its default size of 1:30min to about 4min.
Do you want to do so (y/n)
接下來問是否要做流量限制(rate-limiting),建議選 yes 避免攻擊者短時間內重複嘗試很多次。
If the computer that you are logging into isn't hardened against
brute-force login attempts, you can enable rate-limiting for the
authentication module. By default, this limits attackers to no more
than 3 login attempts every 30s.
Do you want to enable rate-limiting (y/n)
常見問題
1. 如何回復 google authenticator ?
參考 How To Set Up Multi-Factor Authentication for SSH on Ubuntu 18.04 | DigitalOcean
密鑰資訊預設紀錄在 ~/.google-authenticator 檔案中,檔案內容的結構類似這樣:
<secret key>
<options>
<recovery codes>
例如:
6JKTMAXLIZOGTZ5POL3O3F5EZ4
" RATE_LIMIT 3 30
" WINDOW_SIZE 3
" DISALLOW_REUSE
" TOTP_AUTH
31823195
71428595
74350606
90823790
36809436
第一行就是 secret key。當你換手機或手機遺失時,先用別的辦法登入(如 captcha 或 non-ssh 介面登入,請管理員查看),取得 secret key 後,你可以手動輸入手機app,或者透過以下連結產生QRcode
其中 username 是你的使用者名稱,hostname 是欲登入的主機名稱,16-char-secret 是找回的 secret key , entry-name-in-auth-app 是在app中用來區別不同服務的自訂名稱。
或者是使用 recovery code,如果你在設定時有把 recovery code 記下來的話,可以輸入 recovery code 進行登入。但是 recovery code 為一次性使用,用過一次就不能再用了。因此一旦用了,最好再重新設定一次 google authenticator 。
重新設定需要請管理員刪除該使用者的 ~/.google-authenticator 檔案,使用者自己無法刪除(權限不足)。
如果想要修改設定,請參考[2]
2. 對 sudo 或 su 設定 google authenticator
參考 6 easy steps to setup offline two factor authentication in Linux | GoLinuxCloud
對 sudo 設定,開啟 /etc/pam.d/sudo
sudo vi /etc/pam.d/sudo對 su 設定,開啟 /etc/pam.d/su
sudo vi /etc/pam.d/su修改方法同 ssh,將以下兩行加到檔案最頂端
# google authentication
auth sufficient pam_google_authenticator.so nullok
#Autogenerated by libpam-captcha
auth requisite pam_captcha.so math randomstring
3. 設定對某一個 group 的使用者關閉2FA
參考 linux - sshd: How to enable PAM authentication for specific users under - Server Fault
- Create a user group on the Linux instance. MFA/PAM will be disabled for users present in this new group-
sudo groupadd <groupname>
- Create User or add existing user to newly created group-
sudo useradd <username>
sudo usermod -a -G <groupname> <username>
- Edit /etc/pam.d/sshd file and add the below statement to skip PAM module for the newly created group-
auth [success=done default=ignore] pam_succeed_if.so user ingroup <groupname>
4. 開放特定應用使用密碼登入
參考 https://serverfault.com/a/740881/451844
這可以用來讓某些不支援 2FA 的應用(如: sftp) 透過 password 連線
As a side note, if you wish to have an sftp user account, you will probably need to bypass google authenticator in order to get it to work. Here is a suggestion of how to do that securely using an sftp jail. In
etc/ssh/sshd_config:Subsystem sftp internal-sftp Match User ftp-user PasswordAuthentication yes AuthenticationMethods password ChrootDirectory /path/to/ftp/dir ForceCommand internal-sftpYou will need to make the permissions on /path/to/ftp/dir root write only (e.g.
chown root:root /path/to/ftp/dir,chmod 755 /path/to/ftp/dir. All of the parents above that directory also need secure permissions. The way I usually do this is by making the chroot directory/home/shared/user, creating a directory in there (e.g. 'data') and then mounting whatever directory I want to share like this:sudo mount -o bind /path/to/ftp/dir /home/shared/user/dataIf you follow all of those steps, you will have public key + google authenticator login for your ssh users, and a functional password protected sftp account for data transfer.
[1] linux - How do PAM advanced options work, exactly? - Server Fault
PAM modules have over 30 different return values that are mapped to either pass or fail of the whole PAM stack as stated by the configuration.
It is noteworthy that a PAM module may behave different depending on the context (auth, account, password, session) that it is called in.
The pairs of value=action in square brackets describe which action to take for each possible return value of the PAM module.
A good explanation of values and actions can be found by carefully reading the above mentioned page to the end.
success=okthe module has returned success, this will be honored in the evaluation of the whole PAM stack, if no preceding module has failed, consider pass for the whole stack up to this point.new_authtok_reqd=oka new authentication token is required. E.g. in session context this might make the user change her/his password.ignore=ignorethe PAM module wants its result to be ignored, so we ignore it.default=badall other results make the PAM stack fail (but don't stop processing subsequent modules)What happens if the module returns success and one other token?
PAM modules return only a single value.
Finally, I can't find the answer to this question, either: can every value ok, done, bad, die, ignore, reset, N be associated with any action? What would it even mean to say
[default=done] ?This means: any token not mentioned here (i.e. every possible token) ends processing of the PAM stack and returns the result so far.
[2] How To Set Up Multi-Factor Authentication for SSH on Ubuntu 18.04 | DigitalOcean
Here are some changes you can make to this file:
- To enable sequential codes instead of time-based codes, change the line
" TOTP_AUTHto" HOTP_COUNTER 1.- To allow multiple uses of a single code, remove the line
" DISALLOW_REUSE.- To extend the code expiration window to 4 minutes, add the line
" WINDOW_SIZE 17.- To disable multiple failed logins (rate-limiting), remove the line
" RATE_LIMIT 3 30.- To change the rate-limiting threshold, find the line
" RATE_LIMIT 3 30and adjust the numbers. The3in the original indicates the number of attempts over a period, and the30indicates the time in seconds.- To disable the use of recovery codes, remove the five eight-digit codes at the bottom of the file.
[3] Mitigating SSH based attacks – Top 15 Best SSH Security Practices
14. Enable login notifications over email
One of the best things you can do in order to keep a close eye onyour incoming SSH connections is to set up a quick script to send an alert once someone is logged in as root via SSH.
nano -w /root/.bashrc
Paste this at the end of the file:
echo 'ALERT - Root Shell Access (ServerName) on:' `date` `who` | mail -s "Alert: Root Access from `who | cut -d'(' -f2 | cut -d')' -f1`" your@email.com
Replace your@email.com with your real email address.
In order to have this working as expected, make sure to have "mailx" package installed and working. If you don't have it, you can install it by issuing this commands:
For RHEL based distros:
dnf install mailx
Debian/Ubuntu based distros:
apt-get install mailx
系列文章
server 受 ssh暴力登入攻擊的分析與防禦(1)--iptables 的使用
server 受 ssh暴力登入攻擊的分析與防禦(2)--fail2ban 的使用